Hey everyone!
Welcome back to my Blog for another festive tutorial.
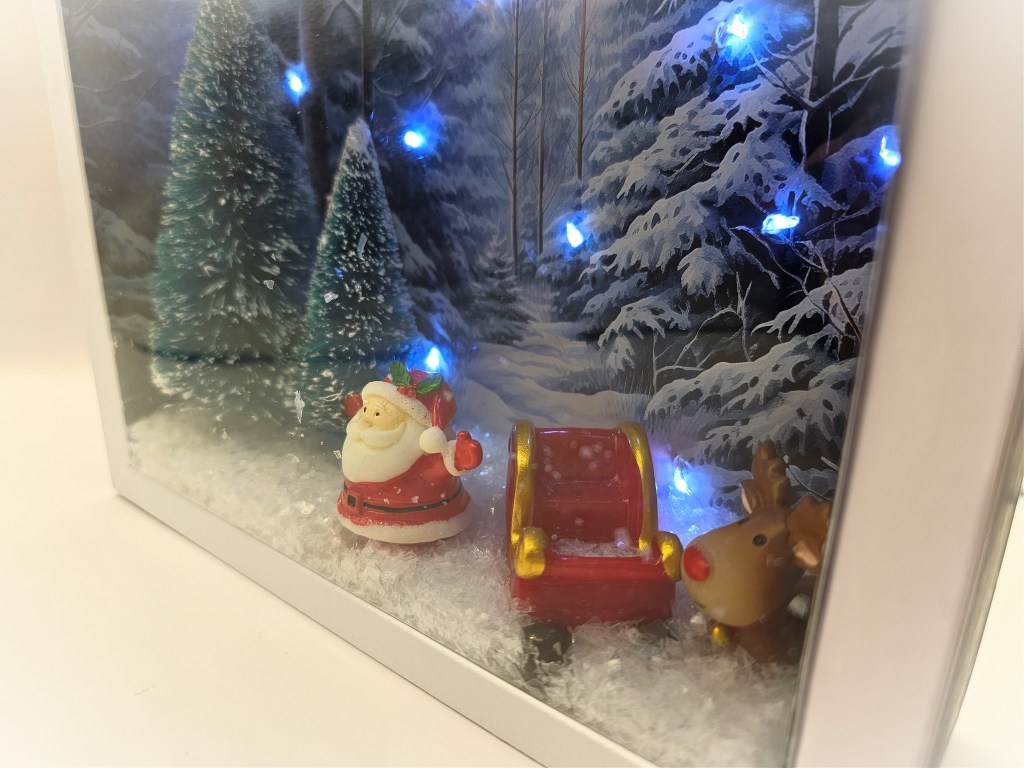
I promised you that I had another idea for the shadow box advent calendar. Wait until you see how real this looks! It truly looks like you can just step right into the forest! I love it.


How cute is this!!
Its very simple to make and easier than the ‘house’ box we made last week.
All the lights are hidden at the back and I also made a little box to hold them in. I just keep staring at it lol it just looks so real.
I am excited to see your versions. All the product links can be found in the video description ( the link will be at the end of this post) .
Below you can find all the written measurements.
THE CARD YOU NEED MEASURES 9 X 5 1/2″ X 2 PIECES
SCORE THE SHORT SIDE @ 1/2, 2 1/2, 3 & 5″
SCORE THE LONG SIDE @ 1/2 AND 1″ BUT THAT ONE IS A PARTIAL SCORE, DO THIS ON BOTH ENDS.
CARD MEASURES 6 X 5 1/2 X 2 PIECES
SCORE THE SHORT SIDE @ 1/2, 2 1/2, 3 & 5″
YOUR ACETATE MEASURES 8 X 6″
SCORE ALL 4 SIDES @ 1/2″
YOUR BACK PANEL AND PAPER MEASURES 7 X 6 OR JUST SLIGHTLY UNDER
YOU NEED 2 INSIDE PIECES OF PATTERNED PAPER MEASURING JUST UNDER 2″ AND JUST UNDER 5″
YOUR OUTSIDE PANELS MEASURES 7 7/8 X 1 7/8″ AND YOU NEED 2 PIECES MEASURING 5 5/8 X 1 7/8″ THIS IS YOUR PATTERNED PAPER.
I will be back again soon with another tutorial.
Bye for now
Ann


Leave a reply to Joan Dickinson Cancel reply